WAVLINK Extender Setup Methods: Browser, WPS and AP
This independent walkthrough explains the common setup logic. Always prioritise the quick-start guide and official support instructions for the exact model.
This page focuses specifically on WAVLINK WiFi extender setup. It also explains WAVLINK repeater setup and WAVLINK login so each check can be completed in the correct order.
Choose the setup method that matches the required backhaul
Record the model number and hardware revision from the label. Confirm whether the device is operating as a repeater, access point or router; the cable requirements and setup screens differ. Use the supplied power adapter and begin near the main router.
Choose WPS or browser setup
WPS is quick when both devices support it and WPS is enabled. Browser setup provides more control over bands, SSIDs and administration credentials. Do not press Reset when you intend to press WPS; reset erases configuration.
Complete browser-based setup
Join the extender’s temporary WiFi, stay connected despite a no-internet warning, and open the address documented for that model. Choose the router network, enter its WiFi password and save. Wait for the extender to reboot before testing.
Complete WPS pairing
Press the router WPS button, then the extender WPS button within the timing described in the manual. Wait for the link indicator. Dual-band models may require an additional pairing step. If pairing fails, move closer and use browser setup for clearer error information.
Place and test the extender
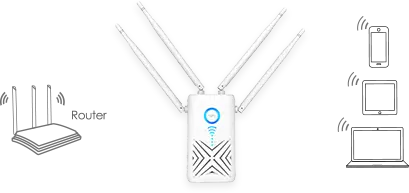
Move the configured extender between the router and coverage gap while keeping a reliable uplink. Test video, calls and browsing in the target room. A strong phone-to-extender signal cannot compensate for a weak extender-to-router signal.
Finish with security and updates
Set a unique admin password, keep wireless encryption enabled and check the official support page for applicable firmware. Match the full model and hardware revision before downloading any update.
Continue from basic WAVLINK setup
Before declaring setup complete
Confirm the selected operating mode, reconnect to the new SSID and turn mobile data off during the first internet test. Check that the device received a private IP and that both configured bands work. Open the local status page or assigned IP, record the administrator password and note the firmware version. Then move the extender gradually toward the coverage gap. If internet disappears only after relocation, the setup details are probably correct but the new outlet provides an inadequate router uplink.
Manufacturer references for extender installation
This guide is based on current manufacturer login, product and troubleshooting information. Addresses, menus, LEDs and reset timing can vary by model, region, firmware and hardware revision.